When it comes to ensuring the safety and performance of your Volkswagen Corrado, proper wheel installation is paramount. A critical aspect of this process is the torque specifications for the wheel nuts. Correct torque not only secures the wheels firmly to the hubs but also prevents unequal wear and tear on both the tires and the vehicle’s components.
Each vehicle model comes with specific requirements for torque settings. For the Corrado, adhering to the manufacturer’s recommendations is essential for maintaining stability and control while driving. Incorrectly torqued nuts can lead to wheel imbalances, vibrations, or even catastrophic failures while on the road.
This article will outline the proper torque specifications for wheel installation on the Corrado, guiding you through the process to ensure that your vehicle operates safely and efficiently. Whether you are a seasoned mechanic or a DIY enthusiast, understanding these specifications is key to a successful and safe wheel installation.
Understanding the Importance of Proper Torque Settings
When installing wheels on a Volkswagen Corrado, proper torque settings are critical for ensuring safety and performance. Torque refers to the rotational force applied to the nuts that secure the wheels to the hub. Achieving the correct torque is essential for several reasons:
- Safety: Incorrect torque can lead to wheel loosening during driving, which increases the risk of accidents.
- Even Distribution: Proper settings ensure that the load is evenly distributed across all wheel nuts, preventing stress concentrations that could lead to failure.
- Component Longevity: Over-tightening can damage wheel components, while under-tightening can lead to wear and tear, necessitating costly repairs.
To achieve the recommended torque specifications, a torque wrench should be used. This tool allows for precise application of force, ensuring that each nut is tightened to the manufacturer’s specifications. Here’s a simple guide on how to use a torque wrench effectively:
- Select the Right Torque Wrench: Use a wrench that can handle the required torque range for your specific model.
- Calibrate Before Use: Make sure the torque wrench is calibrated according to the manufacturer’s guidelines.
- Tighten in a Star Pattern: This method helps ensure even tightening across the wheel.
- Double-Check Settings: After applying torque, recheck each nut to confirm they are secure.
In summary, maintaining the proper torque settings during wheel installation on a Corrado is vital for safety, component longevity, and vehicle performance. Always prioritize using a torque wrench to achieve accurate results.
Identifying the Correct Torque Specifications for Corrado Wheels
When installing wheels on a Volkswagen Corrado, it is crucial to adhere to the correct torque specifications to ensure safety and performance. The proper torque prevents wheel nuts from loosening while driving, which can lead to wheel detachment and serious accidents.
The recommended torque specification for Corrado wheel nuts typically falls within the range of 80 to 100 ft-lbs (108 to 135 Nm). It is essential to verify the exact specification in the vehicle’s service manual, as different models or wheel types may have varying requirements.
Using a reliable torque wrench is key to achieving the correct tightness. Manual torque wrenches allow for precise adjustments, while digital versions may offer added features such as alerts when the desired torque is reached. It’s advisable to apply the torque in a crisscross pattern to promote even pressure distribution across the wheel.
Before placing the nuts on the wheel studs, ensure that both the threads on the studs and the nut surfaces are clean to prevent stripping or binding. After initial installation, it’s wise to retorque the nuts after a short drive, as they may settle and require reinforcing tightness.
In conclusion, following the appropriate torque specifications when installing Corrado wheels is vital for maintaining vehicle safety and performance. Investing in a good torque wrench and understanding the correct procedure will help ensure your wheels are securely fastened.
Selecting the Right Torque Wrench for Wheel Installation
Choosing the appropriate torque wrench is crucial for the safe and effective installation of wheels on your Corrado. A proper torque wrench ensures that the lug nuts are tightened to the manufacturer’s specified torque settings, preventing potential issues such as wheel detachment or damage to the wheel assembly. Here are key factors to consider when selecting a torque wrench for this purpose:
| Factor | Description |
|---|---|
| Type of Torque Wrench | There are several types of torque wrenches, including click-type, beam-type, and digital. Click-type wrenches provide an audible click when the set torque is reached, making them user-friendly for wheel installation. |
| Torque Range | Ensure the torque wrench covers the required torque specifications for your wheels. Most passenger vehicles, including the Corrado, typically require a torque range of 80-100 ft-lbs. |
| Calibration | Regular calibration is essential for accuracy. Verify that the wrench has been recently calibrated to maintain precise torque readings during installation. |
| Drive Size | The drive size of the wrench should be compatible with your lug nut socket sizes. Common sizes are 1/2 inch and 3/8 inch. |
| Materials and Durability | Select a torque wrench made from high-quality materials to ensure longevity and reliability under heavy use, especially when dealing with wheel installation. |
By carefully considering these factors, you can select a torque wrench that will facilitate the correct installation of your wheels, enhancing safety and performance during your driving experience.
Step-by-Step Guide to Wheel Nut Installation on Corrado

Installing wheel nuts on your Corrado requires precision to ensure safety and optimal performance. Follow these steps to achieve the correct torque specifications for your wheel installation.
Step 1: Gather Your Tools
Before starting, collect the necessary tools including a suitable wrench, a torque wrench, and a tire iron. Ensure that your torque wrench is calibrated and capable of measuring the required torque.
Step 2: Secure the Vehicle
Park your Corrado on a level surface and engage the parking brake. If applicable, place wheel chocks behind the rear wheels to prevent any movement during the installation process.
Step 3: Position the Wheel
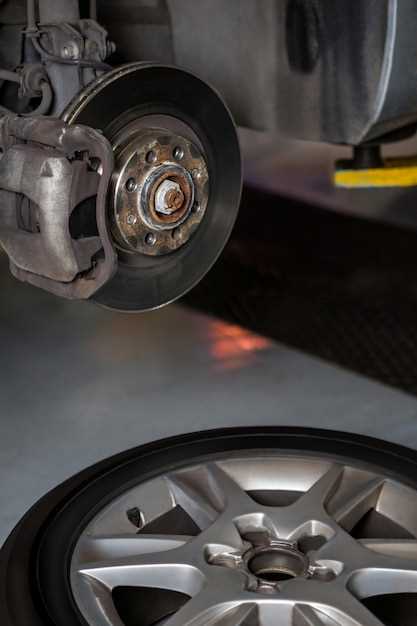
Align the wheel with the hub and gently push it into place. Ensure that the holes in the wheel line up with the wheel studs.
Step 4: Hand Tighten the Nuts
Start by hand-tightening the wheel nuts onto the wheel studs. This will hold the wheel in place while you prepare to torque it down. Make certain that they are snug but not fully tightened at this stage.
Step 5: Torque the Nuts in a Star Pattern
Using your wrench, begin to tighten the nuts in a star pattern. This method evenly distributes pressure across the wheel. Refer to your vehicle’s manual for the specific torque value, typically measured in lb-ft.
Step 6: Set the Torque Wrench
Adjust your torque wrench to the specified torque value for your Corrado. Double-check that the setting is correct before proceeding to the next step.
Step 7: Final Tightening
Once the torque wrench is set, proceed to tighten each of the wheel nuts in the same star pattern. The wrench will click or signal when the desired torque level is reached, indicating that you should stop applying force.
Step 8: Double Check Your Work
After all the nuts have been torqued, double-check each one to ensure they meet the correct specifications. This extra step can help prevent loosening due to vibration during driving.
Step 9: Lower the Vehicle
Carefully lower your Corrado back to the ground if it was lifted. Remove any wheel chocks you placed earlier.
Step 10: Test Drive
Lastly, take your Corrado for a short test drive. After this initial run, it’s advisable to recheck the torque on the wheel nuts to confirm they remain securely fastened.
Common Mistakes in Torque Application and How to Avoid Them
When installing wheels on a Corrado, applying the correct torque is crucial for safety and performance. One of the most common mistakes is not using a calibrated torque wrench. An uncalibrated wrench may yield inaccurate readings, leading to either overtightening or insufficient torque, both of which can compromise wheel integrity.
Another mistake is neglecting to follow the specified torque sequence. Failing to tighten the lug nuts in a crisscross pattern can lead to uneven pressure on the wheel, increasing the risk of warping and wheel misalignment. Always refer to the manufacturer’s guidelines for the correct pattern.
Many individuals overlook the importance of using a properly lubricated thread. Dry threads can cause false torque readings due to friction, making it difficult to achieve the desired tension. Lightly lubricating the threads can help ensure accuracy during application.
Applying torque on a cold lug nut is another common error. After driving, the wheel and its components may expand, leading to improper torque readings if applied immediately. It’s best to allow the vehicle to cool down before rechecking or applying torque.
Finally, avoid using a torque wrench to remove lug nuts. This tool is designed for tightening and can become damaged if used for loosening. Instead, use a standard socket wrench for this task to prevent miscalibration of your torque wrench.
By steering clear of these common mistakes, you can ensure a safer and more effective wheel installation on your Corrado, prolonging both the wheels and vehicle performance.
Regular Maintenance: Checking Torque Settings After Installation

After installing wheels on your Corrado, it is crucial to regularly check the torque settings of the wheel nuts to ensure optimal performance and safety. Torque refers to the rotational force applied to tighten the nuts that secure the wheels to the vehicle. Proper torque specifications help prevent issues such as wheel detachment or uneven tire wear.
Using a calibrated torque wrench, verify the torque settings after the initial installation. It is advisable to check the torque again after the first 50 to 100 miles of driving, as the nuts may settle and require re-tightening. Ensure that you follow the manufacturer’s recommended torque specifications for the Corrado to maintain the integrity of the wheel assembly.
Additionally, regularly check the torque settings every few months or before long road trips. Environmental factors such as temperature changes and road conditions can impact the performance of the wheel nuts, making periodic checks essential. Consistent maintenance will help extend the life of your tires and enhance overall driving safety.
When checking the torque, make sure the vehicle is on a stable surface and the wheels are not spinning. Use the torque wrench in a star pattern to ensure even distribution of the force applied on the nuts. This method helps minimize warping of the brake rotors and keeps the wheels securely fastened.
Regularly maintaining the torque settings of your wheels is a simple yet effective way to prevent mechanical failures and ensure a safe driving experience. Prioritize this practice as part of your vehicle’s routine maintenance schedule.


