

The VW Corrado has earned a reputation for its performance and style, but like any vehicle, it can experience lighting problems that can affect both safety and driving comfort. These issues can range from simple bulb failures to more complex electrical faults within the vehicle’s lighting system.
When faced with lighting faults in your VW Corrado, it is essential to approach the troubleshooting process methodically. Identifying the source of the problem can save both time and money, and understanding common issues will empower you to tackle repairs confidently. From checking fuses to inspecting wiring, each step is critical in diagnosing the specific problems present in your vehicle.
By delving into the various aspects of the lighting system, including the headlamps, taillights, and indicators, you can gain insight into effective repair methods. This guide aims to provide comprehensive troubleshooting steps to ensure that your VW Corrado’s lights function optimally, enhancing your overall driving experience.
Identifying Common Wiring Faults in VW Corrado Lighting Systems
The VW Corrado, known for its sporty design and enthusiastic driving experience, can sometimes suffer from lighting problems that originate from wiring faults. Proper lighting is crucial for safety, requiring a thorough understanding of potential issues that may arise within the wiring system.
One of the most common faults involves broken or frayed wires. Over time, the insulation on wiring can deteriorate due to factors such as heat, vibrations, and moisture exposure. Inspect the wiring harness for any signs of wear or damage. Look for exposed copper, which indicates a potential electrical short that may lead to problems like flickering lights or complete failure.
Another issue pertains to poor connections. Corrosion at connectors can impede the electrical flow, causing issues such as dim lighting or intermittent operation. Regularly check all connectors for signs of rust or dirt buildup. Cleaning these connections can often resolve issues without requiring extensive repairs.
Additionally, a common problem involves incorrect wiring during previous repairs or modifications. If aftermarket lights or modifications have been made, make sure the wiring matches the factory specifications. Crossed wires can lead to malfunctions or even damage the vehicle’s electrical system.
Finally, don’t overlook the presence of ground faults. The grounding system in the VW Corrado plays a significant role in ensuring proper lighting functionality. A poor ground connection can result in erratic light behavior. Check ground points for tightness and integrity, ensuring that they are free from rust or corrosion.
In conclusion, being aware of these common wiring faults can aid in troubleshooting lighting issues effectively. Regular inspection and maintenance of the wiring system will help keep your VW Corrado’s lights functioning reliably.
Steps to Diagnose Headlight Malfunctions in VW Corrado
When facing headlight malfunctions in a VW Corrado, it’s crucial to follow a systematic approach to pinpoint the issue effectively. Start by examining various components and wiring to identify faults that may be impacting the lighting performance.
- Visual Inspection:
- Inspect the headlights for any physical damage or burnt-out bulbs.
- Check the lens for moisture or condensation, which may indicate a seal failure.
- Examine the wiring harness for frayed or broken wires.
- Test the Bulbs:
- Remove the headlight bulbs and test them individually using a multimeter.
- Replace any bulbs that show signs of being non-functional.
- Inspect the Fuses:
- Locate the fuse box and check the headlight fuse for continuity.
- Replace any blown fuses with the appropriate rating.
- Check the Wiring:
- Trace the wiring from the headlight back to the switch, looking for any signs of damage or corrosion.
- Use a multimeter to test for voltage at the wiring connectors while the headlights are switched on.
- Examine the Headlight Switch:
- Test the headlight switch for proper operation by checking for continuity across the switch terminals.
- Replace the switch if faults are detected during testing.
- Check Ground Connections:
- Ensure all ground connections are clean and secure to prevent poor lighting performance.
- Use a multimeter to confirm a good ground connection at the headlights.
After completing these steps, if the headlight malfunctions persist, it may be necessary to consult a professional mechanic for further diagnosis and repair of more complex wiring issues or faults in the lighting system.
Understanding the Role of Fuses in VW Corrado Lighting Problems
Fuses play a crucial role in the electrical systems of the VW Corrado, particularly when it comes to lighting. When the vehicle experiences faults in its lighting system, one of the first components to check is the fuse. Fuses are designed to protect the electrical circuits from overloads, and when a fuse blows, it interrupts the flow of electricity to specific components, including lights.
In the VW Corrado, there are multiple fuses responsible for different lighting functions such as headlights, tail lights, and interior lights. Understanding which fuses correspond to specific lights can help diagnose lighting problems effectively. The owner’s manual typically provides a fuse diagram that indicates the location and purpose of each fuse.
| Fuse Type | Function | Common Problems |
|---|---|---|
| Headlight Fuse | Supplies power to the headlights | Non-functional headlights, dim lighting |
| Tail Light Fuse | Powers the brake and tail lights | Inoperable tail lights, safety concerns |
| Interior Light Fuse | Controls dashboard and cabin lights | Interior lights not illuminating, visibility issues |
If lighting problems arise, start by inspecting the relevant fuses. A blown fuse can often be visually identified by a broken filament. In many cases, replacing a faulty fuse resolves the issue. However, if the new fuse blows shortly after replacement, this indicates a deeper electrical fault that needs further investigation. Possible causes for recurring blown fuses include short circuits, faulty wiring, or malfunctioning components within the lighting system.
Regular maintenance and checks of the fuse box can prevent lighting problems before they escalate. Ensuring that all electrical connections are secure and free from corrosion is also essential for the reliable operation of the VW Corrado’s lighting system.
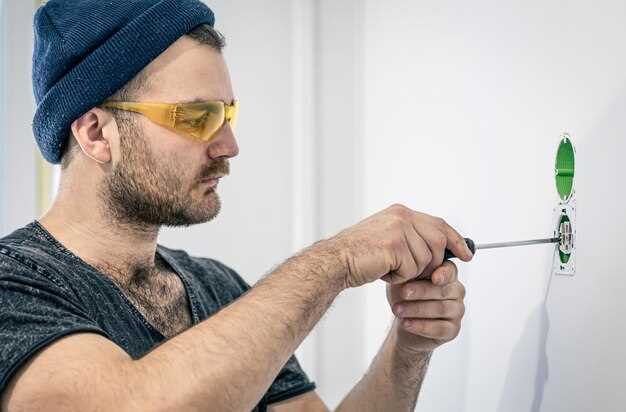
How to Inspect and Repair Faulty Light Switches in VW Corrado
Inspecting and repairing faulty light switches in a VW Corrado requires a systematic approach to ensure proper functionality of the vehicle’s lighting system. Begin by turning off the ignition and disconnecting the battery to prevent any electrical shorts while working on the wiring.
Next, remove the trim surrounding the light switch. This typically involves unscrewing several screws or gently prying off plastic clips. Once the trim is removed, you should have access to the light switch assembly. Inspect the switch for any visible signs of damage, such as cracks or burn marks, which may indicate faults in the internal components.
After visually inspecting the switch, check the wiring connections attached to it. Loose or corroded wiring can lead to poor connectivity, affecting the lighting performance. Ensure that all connectors are secure and free of rust. If you notice any damaged wires, cut and splice them as needed, making sure to use appropriate insulation to prevent shorts.
If the switch appears to be in good condition but still doesn’t function properly, use a multimeter to test for continuity. This will help identify if there are any internal faults within the switch itself. If the multimeter indicates an open circuit, you may need to replace the switch entirely.
Once repairs or replacements are made, reassemble the components in reverse order and reconnect the battery. Finally, test the lighting system to ensure that all functions operate correctly, verifying that the issues initially faced have been resolved.
Techniques for Resolving Tail Light Issues in VW Corrado
Troubleshooting tail light problems in the VW Corrado often involves a systematic approach to identify and resolve issues effectively. These problems can stem from various sources, including faulty bulbs, compromised wiring, or control module failures.
First, inspect the bulbs. Start by removing the tail light assembly and visually checking each bulb for signs of burn out or damage. Replace any defective bulbs with new ones that meet the manufacturer’s specifications.
If the bulbs are functioning properly, the next step is to examine the wiring. Look for any signs of wear, loose connections, or corrosion. Pathways that are frayed or exposed can lead to inconsistent lighting behavior. Consider using a multimeter to test continuity through the wires, ensuring that electrical flow is uninterrupted.
In cases where wiring appears intact, assess the lighting control module. This component regulates the electrical flow to the tail lights and may be the source of intermittent problems. Using a diagnostic tool can help determine if the module is functioning correctly or if it requires replacement.
If you encounter persistent issues, consult the wiring diagram specific to your vehicle model. This will provide insight into the electrical pathway and help locate potential trouble spots more efficiently. Always ensure connections are secure and insulated to prevent moisture ingress.
Lastly, after making any repairs, conduct a thorough test of the tail lights. Activate the brakes and turn signals to ensure proper functionality and brightness. Remember that troubleshooting electrical issues often requires patience and attention to detail.
Utilizing a Multimeter to Trace Electrical Shorts in VW Corrado
When troubleshooting lighting faults in a VW Corrado, utilizing a multimeter is essential for diagnosing electrical shorts. A multimeter allows you to measure voltage, current, and resistance, making it an invaluable tool in identifying problems within the vehicle’s electrical system.
Start by ensuring that the car’s ignition is off. Disconnect the negative battery terminal to avoid any accidental short circuits while working. Set the multimeter to the appropriate setting for measuring resistance (ohms) to check for continuity in the wiring.
Inspect the wiring harness, especially around connectors and junction points where shorts are commonly found. Place one probe of the multimeter on the ground point and the other on various points along the circuit. If you encounter readings close to 0 ohms, it indicates a direct short to ground that must be addressed.
Next, check for circuit integrity by testing each component in the lighting system. With the multimeter set to the voltage measurement mode, turn on the vehicle’s ignition and activate the lighting circuit in question. By probing the lighting connections, you can verify whether voltage is reaching the bulbs. A lack of voltage suggests a fault upstream in the circuit, which requires further investigation.
In addition, consider checking for unusual resistance values. High resistance in the circuit can lead to insufficient voltage at the lighting component, resulting in dim or malfunctioning lights. By systematically probing different points and components with your multimeter, you can isolate the source of electrical shorts and resolve lighting problems effectively.
Once the faults have been identified, make necessary repairs or replacements of damaged wiring or components. After completing the repairs, recheck the system with the multimeter to ensure all issues have been resolved and proper functionality is restored to the vehicle’s lighting.


