

Restoring a classic car like the Corrado is a rewarding project that combines passion, skill, and dedication. This restoration journey not only transforms a vehicle back to its former glory but also allows enthusiasts to create a personal connection with their car. Each step in the process requires careful planning and execution, making it crucial to understand what lies ahead.
Initiating your restoration project involves assessing the condition of the car, identifying necessary repairs, and setting realistic goals. A thorough evaluation of the vehicle will help you prioritize tasks, whether it’s bodywork, mechanical repairs, or interior refurbishment. Understanding the scope of the project will guide you in sourcing parts and potentially collaborating with professionals when needed.
Throughout this guide, we will walk you through the step-by-step process of restoring your Corrado, emphasizing essential techniques, tools, and tips. Whether you are a seasoned restorer or a newcomer to the world of car restoration, this comprehensive approach will ensure that you not only learn but also enjoy the journey of bringing your car back to life.
Assessing the Condition of Your Corrado
Before diving into your full restoration project, it’s essential to thoroughly assess the condition of your Corrado. This step will provide a clear understanding of the work required and help prioritize tasks effectively. Start by conducting a visual inspection of the car’s exterior. Look for signs of rust, scratches, and dents that could indicate the level of body repair needed.
Next, examine the structure beneath the surface. Check for any structural damage, especially in the floor pans, wheel wells, and the chassis. These areas can often conceal hidden problems. If possible, use a magnet to identify areas where bodywork may have been conducted previously, which could affect future restoration efforts.
Moving to the mechanical components, assess the engine and transmission. Start the car and listen for unusual sounds, which may indicate potential issues. Evaluate fluid levels and look for leaks. Consider the condition of the brakes, suspension, and electrical systems, as these components are vital for the car’s overall functionality.
Don’t forget to check the interior as well. Inspect the seats, dashboard, and carpets for wear and tear. Upholstery and interior panels can affect the overall restoration aesthetic, so take note of any repairs or replacements needed.
Lastly, compile your findings into a detailed list. This inventory will not only guide your restoration project but also provide a realistic timeline and budget. Assessing the condition of your Corrado is a crucial step that lays the foundation for a successful and rewarding restoration journey.
Creating a Detailed Restoration Budget

When embarking on a full car restoration project, creating a detailed budget is essential for ensuring that the restoration process proceeds smoothly and stays on track financially. A well-planned budget helps manage your resources effectively and avoid unexpected expenses that can derail your project.
To start, identify all the potential costs involved in the restoration project. This includes parts, labor, and additional services. Break down each area into specific items to better estimate the overall expenses.
| Budget Category | Estimated Cost | Status |
|---|---|---|
| Bodywork and Paint | $3,000 | Planned |
| Engine Repair | $1,500 | Planned |
| Interior Restoration | $2,000 | Planned |
| New Tires | $800 | Planned |
| Miscellaneous Parts | $600 | Planned |
| Labor Costs | $2,000 | Planned |
| Total Estimate | $10,900 | N/A |
Be sure to account for both fixed and variable costs. Fixed costs, such as bodywork and paint, can be estimated more easily, while variable costs, like labor, might fluctuate based on the project duration. Always leave room in your budget for unexpected expenses, typically recommended to be around 10-20% of your total budget.
Once your budget is complete, review it periodically throughout the restoration process. Keep track of all expenses as you progress to ensure you stay within your financial limits. This will help maintain focus on your project goals while allowing for adjustments if necessary.
Gathering Necessary Tools and Equipment
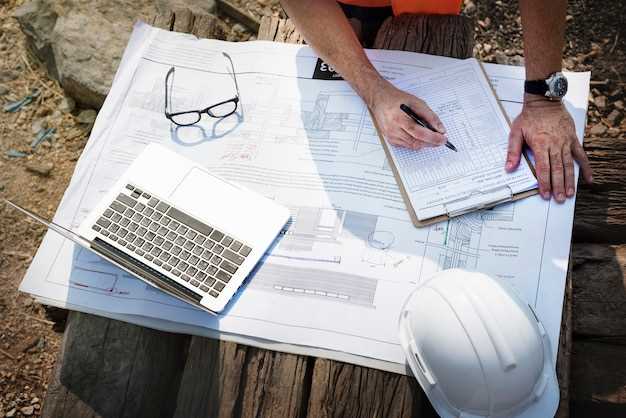
Starting a classic car restoration project, such as a Corrado, requires a well-thought-out selection of tools and equipment. Proper preparation can significantly influence the quality and efficiency of your work. Begin by compiling a comprehensive list of essential tools to ensure you are fully equipped to tackle any aspect of the restoration process.
First, consider the hand tools necessary for disassembly and assembly. A set of wrenches, sockets, and screwdrivers in various sizes will allow you to take apart numerous components of the vehicle. Pliers, hammers, and chisels are also valuable for more intricate tasks and adjustments. Ensure these tools are of high quality, as they will be put to the test during the restoration process.
Next, you’ll need power tools, which can greatly accelerate your work. A reliable electric or battery-operated drill is indispensable for tasks requiring precision and efficiency. Additionally, a grinder and a sander will be essential for bodywork and paint preparation. An air compressor, along with various pneumatic tools, can also enhance your capabilities when working on the engine or suspension systems.
Don’t forget about safety equipment. Restoring a classic car often involves working with chemicals, welding, and heavy components. Invest in a good quality pair of safety goggles, gloves, and a respirator to protect yourself from dust and harmful fumes. A sturdy pair of work boots will also help ensure safety while working under and around the vehicle.
Finally, consider workspace organization. Tool chests, storage bins, and shelving can help keep your tools accessible and your workspace tidy. A robust workbench will provide a solid surface for repairs and assembly, making the entire process smoother and more efficient.
Gathering the necessary tools and equipment is a crucial first step in your classic car restoration journey. A well-prepared workspace not only aids in achieving the best results but also enhances your overall experience as you breathe new life into your beloved Corrado.
Disassembling and Documenting the Vehicle
Starting your restoration project on a classic car requires careful planning and execution, especially during the disassembly phase. This step is crucial for determining the overall condition of the vehicle and understanding what parts need repair or replacement.
Begin by thoroughly documenting the current state of the car. Take high-resolution photographs from multiple angles, capturing both the exterior and interior details. Additionally, make note of any visible rust, dents, or signs of wear. This documentation will serve as a reference point throughout the restoration process.
Before disassembling, gather all necessary tools and supplies. Having a dedicated workspace will ensure that the project stays organized. As you start removing parts, it is important to label each component and store bolts and screws in clearly marked bags. This will save time during reassembly, making it easier to find specific parts.
Work systematically, disassembling the vehicle part by part. Start with the less complex components, such as the interior and exterior trim, before moving on to mechanical and structural elements. This methodical approach helps prevent confusion and reduces the likelihood of damaging sensitive components.
For every part you remove, document its condition and any relevant information, such as the part number or manufacturer. Use detailed notes or a digital spreadsheet for this purpose. This record will prove invaluable when sourcing replacement parts for your restoration project.
Lastly, don’t hesitate to seek advice from online communities or local experts. Sharing your experience and asking questions will enhance your knowledge and further assist in the successful disassembly and documentation of your classic car restoration project.
Choosing the Right Parts and Materials
When embarking on a full restoration project for a classic Corrado, selecting the appropriate parts and materials is crucial for ensuring longevity, reliability, and authenticity. The quality of these components not only influences the overall outcome but also impacts the car’s value and performance.
Here are some vital considerations for choosing the right parts and materials:
- Authenticity: Strive to use OE (Original Equipment) parts wherever possible. This maintains the classic integrity of your vehicle and can enhance its resale value.
- Quality: Opt for high-quality replacements. While aftermarket parts may be cheaper, subpar materials can lead to more frequent repairs in the long run.
- Reputation of Suppliers: Research and select reputable suppliers or manufacturers. Read reviews and ask fellow enthusiasts for recommendations to ensure you source reliable and durable components.
Additionally, consider the following types of parts and materials:
- Engine Components:
- Cylinder heads
- Pistons
- Camshaft
- Body Parts:
- Panels
- Glass
- Trim and molding
- Suspension Parts:
- Shocks
- Springs
- Bushings
- Electrical Components:
- Wiring harnesses
- Control units
- Lighting fixtures
Another essential factor is the environment in which you plan to drive your restored Corrado. If you live in an area with variable weather conditions, consider using materials that can withstand corrosion and wear. For instance, opting for stainless steel or treated metals can enhance durability.
Lastly, don’t overlook the importance of community support. Engage with online forums or local car clubs dedicated to the Corrado. These groups can provide insights and tips about sourcing the best parts and materials, thereby enriching your restoration journey.
By carefully selecting the right components, you can ensure that your restoration project is successful and that your classic Corrado will stand the test of time, both in performance and aesthetics.
Reassembly and Final Touches for a Successful Finish
The reassembly phase of your classic car restoration project is a crucial step that requires precision and attention. This stage not only involves putting the pieces back together but also ensuring that every component functions optimally. Here are the key aspects to focus on during reassembly:
- Organized Workspace: Maintain an orderly workspace to keep track of all components. Use labeled containers for small parts and hardware to avoid confusion.
- Reinstallation of Components: Follow the reverse order of disassembly. Carefully reinstall each part, ensuring that all connections are secure, and avoid over-tightening bolts to prevent damage.
- Electrical System Checks: Reconnect the wiring harnesses and check all electrical components, such as lights and ignition systems, to ensure they operate correctly before sealing panels.
- Fluid Systems: Refill engine oil, coolant, and any other necessary fluids. Check for leaks as you reassemble the engine components and ensure all hoses are securely connected.
After the major components are in place, it’s time for final touches. These finishing details significantly impact the overall aesthetic and performance of your restored classic car.
- Paint and Finish: If you opted for a new paint job, inspect the finish for any imperfections. Polish and apply a protective wax to give it that showroom shine.
- Interior Details: Reinstall interior components such as upholstery, dashboard, and carpeting. Pay attention to details like trim and knobs to ensure they are clean and functional.
- Final Inspections: Conduct a comprehensive inspection of the entire vehicle. Check for any loose parts, alignment issues, or unaddressed paint imperfections.
- Test Drive: Once everything is reassembled and detailed, take the car for a test drive. Pay attention to any unusual sounds or behaviors, adjusting components as necessary for optimal performance.
Completing the reassembly and adding final touches is vital for the success of your classic car restoration project. Take your time to go through each step carefully, as a little extra effort now will lead to a beautifully restored vehicle that you can take pride in for years to come.


