

The iconic Volkswagen Corrado has earned a special place in the hearts of car enthusiasts, with its sporty design and thrilling performance. However, over time, the seating upholstery can become worn and show signs of age, affecting not only the aesthetics but also the comfort of the driving experience. This guide aims to provide a comprehensive approach to repairing the worn seats of your Corrado, allowing you to rejuvenate their appearance and extend their life.
Restoring seat upholstery may seem like a daunting task, but with the right tools, materials, and a little patience, it can be an enjoyable DIY project. In this article, we will walk through the essential steps to assess the condition of your seats, select appropriate materials, and execute repair techniques that will bring your Corrado seats back to their former glory. Whether you are dealing with cracked leather, faded fabric, or simply a general lack of support, this guide will empower you to tackle the challenge with confidence.
Join us as we delve into the world of upholstery repair, exploring tips and tricks to achieve professional-looking results. By following this DIY guide, you will not only enhance the aesthetics of your Corrado but also experience the satisfaction that comes from completing a project on your own. Get ready to revitalize your car’s interior and make every drive a pleasure once again.
Assessing Damage and Identifying Repair Needs
Before embarking on the restoration of worn Corrado seats, it is crucial to assess the extent of damage to the upholstery. A thorough examination will help identify specific areas that require repair, ensuring a more focused and effective restoration process.
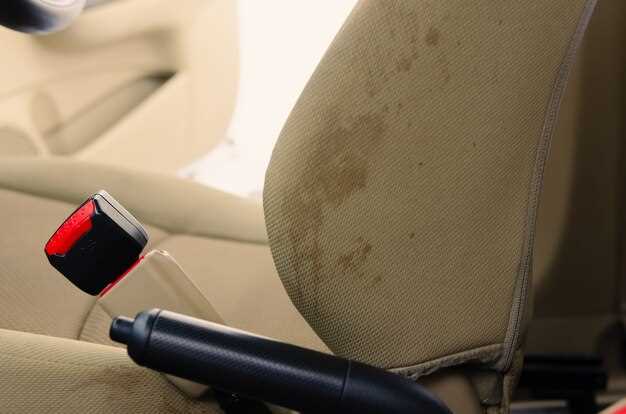
First, inspect the fabric or leather for any tears, stains, or fading. Pay close attention to seams, as these can be weak points that may need reinforcement or re-stitching. If the upholstery is frayed, determine if it can be repaired with patching techniques or if a complete replacement is necessary.
Next, evaluate the padding and support underneath the upholstery. Sit on the seats and take note of any sagging or discomfort, which may indicate that the foam padding has deteriorated. If the foam is compressed or damaged, it will likely need replacement to restore comfort and support.
Additionally, examine any mechanical components such as seat frames and recliners. Rust or corrosion can weaken these structures, necessitating repairs or replacements to ensure safe and functional seating.
Finally, document your findings clearly. Take photographs of damaged areas, and make a list of repair needs prioritized by severity. This assessment will guide you in sourcing materials and tools necessary for repairing and restoring your Corrado seats effectively.
Choosing the Right Upholstery Fabric for Corrado Seats
When it comes to restoring worn Corrado seats, selecting the appropriate upholstery fabric is crucial for both aesthetics and durability. The right fabric can enhance the look of your vehicle while providing comfort and longevity. Below are key factors to consider when choosing upholstery for your Corrado seats.
- Material Type:
Consider the types of materials available. Common options include:
- Leather: Offers a classic and luxurious look but may require regular maintenance.
- Vinyl: Durable and easy to clean, making it a practical choice for everyday use.
- Fabric: Provides comfort and breathability; however, it may not be as durable as leather or vinyl.
- Durability:
The upholstery should withstand daily wear and tear. Look for fabrics that are specifically designed for automotive use, as these materials often have higher resistance to fading, tearing, and staining.
- Color and Texture:
Your chosen fabric’s color and texture can make a significant impact on the interior appearance. Match the new upholstery with the overall theme of your Corrado or opt for a contrasting color to add a modern touch.
- Comfort:
Ensure the upholstery provides adequate comfort. Fabrics with a bit of stretch can conform to your body better, enhancing the driving experience. Consider padded options for additional comfort.
- Budget:
Evaluate your budget. While it’s tempting to go for the cheapest option, investing in quality upholstery can save you money in the long run by reducing the frequency of repairs.
- DIY vs. Professional Installation:
Finally, decide whether you will tackle the upholstery project yourself or hire a professional. Some fabrics may be more challenging to work with, and seeking help might be beneficial if you lack experience.
By carefully considering these factors, you can choose the right upholstery fabric for your Corrado seats, ensuring a successful repair and an overall improved driving experience.
Step-by-Step Instructions for Removing Seat Covers
Removing the seat covers from your Corrado requires a systematic approach to protect both the upholstery and the underlying structure. Follow these steps to ensure a smooth and effective removal process.
Begin by gathering your tools: a flathead screwdriver, a Phillips screwdriver, pliers, and a pair of scissors. Make sure you have a clean workspace to lay out the removed covers and components.
First, tilt the seat forward to access the rear screws. Use the appropriate screwdriver to remove these screws, keeping them in a safe place for reinstallation later. Once the screws are out, you can gently pull the seat cover at the rear to loosen it.
Next, locate any clips or fasteners that hold the cover to the seat frame. Carefully detach them using your flathead screwdriver or pliers, making sure not to damage the upholstery or foam beneath. Take your time with this step, as rushing can lead to accidental tears.
After removing the rear fasteners, focus on the sides of the seat. Release any side clips or hooks in a similar manner. If the covers are attached with zippers, carefully unzip them to avoid ripping the fabric.
Proceed to the front section of the seat. Gently lift the cover from the bottom, making sure to check for hidden clips or screws. Remove these as necessary. If the seat is equipped with armrests, do not forget to detach any attached covers by removing the screws or clips located underneath.
Once all components are released, carefully peel the seat cover off from the top towards the bottom. Work slowly to ensure you do not stretch or damage the upholstery fabric during removal. If the cover is particularly tight, you may need to wiggle it gently to ease it off.
With the seat cover fully removed, inspect the upholstery for any signs of damage or wear. This will help you determine if further repair is necessary before reupholstering the seats. Make sure to clean and prepare the seat frame for any upcoming modifications.
Finally, store the seat cover in a safe place, as it may be needed for reference during the reupholstering process. Following these steps carefully will ensure that you maintain the integrity of the upholstery while preparing your Corrado seats for restoration.
Techniques for Repairing Foam and Padding Issues
Restoring worn Corrado seats often involves addressing problems with foam and padding. Over time, the original upholstery can become compressed, leading to insufficient support and discomfort. Here are some effective techniques for repairing these issues.
First, assess the condition of the foam. If it is simply compressed but still holds its shape, you can rejuvenate it by adding foam reinforcements. Cut new foam pieces to fit the existing seat contours and attach them using adhesive. Ensure that the new foam layer is of similar density to the original to maintain comfort levels.
For areas that are damaged or crumbling, replacing the foam entirely may be necessary. Carefully remove the old padding and measure the dimensions of the seat to purchase foam of the right thickness and density. When installing new foam, use a high-quality adhesive to secure it in place. This will provide a solid foundation under the upholstery.
In some cases, adding cushioning layers can enhance comfort. Consider using memory foam or gel pads for added support. Cut these materials to size and place them on top of the existing or new foam before reattaching the upholstery. This layer can significantly enhance the seating experience, especially for long drives.
Finally, after addressing the foam issues, ensure that the upholstery is snugly fitted over the repaired seat. Loose or bunched fabric can diminish the overall appearance and comfort. Trim any excess foam, if necessary, to create a smooth surface before reupholstering. This attention to detail will contribute to a professional finishing touch on your restored seats.
Reupholstering Seats with New Fabric: A Guide
Reupholstering your worn Corrado seats can significantly enhance both comfort and aesthetics. This guide will walk you through the essential steps to repair and restore your seats using new fabric.
Start by removing the seats from the vehicle. This process usually involves unscrewing bolts located at the base of each seat. Ensure you disconnect any electrical components, such as heated seat wiring, before fully detaching them.
Once the seats are removed, locate the staples or fasteners that hold the original upholstery in place. Use a staple remover or flathead screwdriver to carefully take off the old fabric. Take note of how the original fabric is attached, as this will aid in the reupholstering process.
After stripping the old fabric, inspect the foam padding for damage. If the foam is worn or damaged, consider replacing it to ensure a comfortable seating experience. New foam can be cut to size and layered as needed.
Select high-quality upholstery fabric that matches your vehicle’s interior design. Measure the seat dimensions accurately to ensure you purchase enough material. While choosing the fabric, consider durability and ease of cleaning, as these factors will impact the longevity of your repair.
Cut the new fabric according to the measurements taken from the original upholstery. Leave extra fabric for tucking and stapling. Start by fitting the fabric around the seat’s contours; secure it temporarily with a few pins.
Once the fabric is positioned correctly, begin stapling it into place, starting from the center and working outwards. This method helps to eliminate wrinkles and ensures a snug fit. Be cautious not to damage the foam underneath while stapling.
After securing the fabric, reattach any trim pieces that were removed during the disassembly. Check that all components are fitted correctly and that the fabric is taut and smooth across the seat surface.
Finally, reinstall the seats into your vehicle, ensuring to reconnect all electrical components if applicable. Enjoy your newly upholstered seats, which should look and feel significantly refreshed, providing a comfortable driving experience once again.
Finishing Touches: Tips for Maintaining Restored Seats
Once you have successfully restored the upholstery of your Corrado seats, maintaining them is crucial to ensure lasting beauty and functionality. Here are some tips to help you keep your restored seats in top condition.
| Tip | Description |
|---|---|
| Regular Cleaning | Use a soft brush or vacuum cleaner to remove dirt and debris from the upholstery. Spot clean stains immediately with a gentle, upholstery-safe cleaner. |
| Avoid Direct Sunlight | Park your vehicle in shaded areas or use sunshades to minimize UV damage, which can fade and weaken the upholstery fibers over time. |
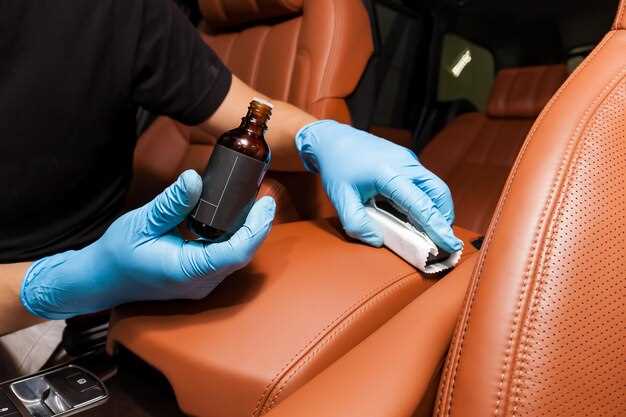
| Use Fabric Protector | Apply a fabric protector designed for upholstery after restoring. This adds a layer of defense against stains and makes cleaning easier. |
| Check for Wear Regularly | Inspect your seats for any signs of wear or damage, such as fraying seams or loose upholstery. Early detection can make repairs simpler and prevent further degradation. |
| Repair Minor Damage Promptly | If minor damages occur, address them immediately to avoid more extensive repairs later. Use appropriate repair techniques that match your upholstery material. |
By following these maintenance tips, you can ensure that your restored Corrado seats remain looking great and function well for years to come. Regular attention and care will help preserve the quality of your upholstery and the overall aesthetic of your vehicle’s interior.


