

The VR6 engine is a beloved powerplant among automotive enthusiasts, particularly those who own the iconic Volkswagen Corrado. Rebuilding this engine not only enhances its performance but also provides a deep sense of satisfaction and accomplishment. In this guide, we will take you through the intricate process of rebuilding the VR6 engine, ensuring that you have the necessary knowledge and tools to tackle this ambitious project.
To successfully rebuild your VR6 engine, a systematic approach is essential. From disassembly to reassembly, each step requires careful attention to detail and a solid understanding of engine mechanics. Throughout this article, we will highlight critical aspects of the engine rebuilding process, including parts inspection, block machining, and timing adjustments. By following these steps, you can restore your Corrado’s performance and breathe new life into its powertrain.
Whether you are an experienced mechanic or a dedicated DIYer, this step-by-step guide aims to empower you with the knowledge needed to bring your VR6 engine back to life. Prepare to dive into the world of engine rebuilding, where precision and passion converge to create a driving experience that is as exhilarating as it is rewarding.
Gathering Necessary Tools and Parts for the Rebuild
Rebuilding the VR6 engine requires a specific set of tools and parts to ensure the process runs smoothly and efficiently. First, gather essential hand tools such as wrenches, pliers, and sockets, specifically metric sizes, which are commonly used in German engineering. A torque wrench is crucial for achieving the correct specifications during reassembly.
Next, invest in specialized tools like a harmonic balancer puller, engine stand, and camshaft timing tool. These tools will significantly simplify the disassembly and reassembly stages of the rebuild. Additionally, having a complete set of screwdrivers, both flathead and Philips, will help with various components throughout the engine.
In terms of parts, start by procuring a high-quality rebuild kit. This typically includes piston rings, gaskets, bearings, and oil seals. Ensure that the parts you select are compatible with the VR6 engine specification. It’s also wise to check for upgraded components, such as performance camshafts or stronger connecting rods, if desired.
Don’t overlook essential fluids for the rebuild, including engine oil, coolant, and potentially new fuel lines. A new water pump and thermostat are advisable to prevent future overheating issues. Lastly, gather cleaning agents for parts, such as degreasers and lubricants, to ensure optimal performance post-rebuild.
By gathering these tools and parts ahead of time, you will create a more organized and efficient working environment, leading to a successful VR6 engine rebuild for your Corrado.
Disassembling the VR6 Engine: Step-by-Step Guide
Disassembling the VR6 engine is a critical step in the rebuilding process. Following this guide will help ensure that you carefully and systematically take apart your engine without causing damage to any components.
- Preparation
- Gather necessary tools: socket set, wrenches, screwdrivers, torque wrench, and pliers.
- Ensure you have a clean workspace with adequate lighting.
- Organize containers for small parts and hardware to prevent loss.
- Disconnect Battery
- Remove the negative terminal from the battery to prevent electrical shorts.
- Remove Engine from Vehicle
- Drain all fluids: oil, coolant, and fuel.
- Disconnect all wiring harnesses and hoses connected to the engine.
- Unbolt the engine from the transmission and engine mounts.
- Use an engine hoist to lift the engine out of the vehicle safely.
- Remove Accessories
- Take off the alternator, power steering pump, and air conditioning compressor.
- Remove the intake manifold and throttle body from the engine.
- Detach the Cylinder Heads
- Remove the valve covers to access the cylinder heads.
- Unbolt the cylinder heads in the correct sequence to avoid warping.
- Carefully lift the heads off the engine block and set them aside.
- Remove the Timing Components
- Take off the timing cover to expose the timing chain or belt.
- Detach the timing components without damaging any gears or chains.
- Remove the Oil Pan
- Unbolt and detach the oil pan from the engine block.
- Clean the mating surfaces to prepare for reassembly.
- Extract the Pistons and Crankshaft
- Remove connecting rod caps to free the pistons.
- Gently push the pistons out of the cylinders from the top.
- Unbolt the crankshaft and carefully lift it out of the engine block.
Following these steps will ensure that your VR6 engine is disassembled properly. Keep all components organized and clearly labeled to facilitate a smoother rebuilding process.
Inspecting and Cleaning Engine Components Before Reassembly
Before you dive into the intricacies of rebuilding your VR6 engine for your Corrado, it’s essential to properly inspect and clean all components. This step ensures the longevity and performance of your rebuilt engine. A meticulous inspection can uncover wear, damage, and contaminants that could affect engine performance.
Start by removing all external components, including intake manifold, exhaust manifold, and any ancillary accessories. Carefully examine each part for signs of wear, cracking, or corrosion. Focus particularly on sealing surfaces and critical components like valves and piston rings. If you find any significant damage, consider replacing the part rather than risking future engine problems.
Once the inspection is complete, the cleaning process begins. Use a degreaser to eliminate oil and grime from all components. For smaller parts, an ultrasonic cleaner can effectively remove contaminants that are hard to reach. Pay special attention to areas that could harbor dirt or debris, such as oil passages and valve guides.
For the cylinder head and block, a thorough cleaning is critical. Use a soft wire brush or non-abrasive cleaning pad to avoid damaging the surfaces. After cleaning, inspect the mating surfaces to ensure they are flat and free from any old gasket material. A crooked or damaged surface can lead to sealing issues once the engine is reassembled.
Don’t overlook the importance of cleaning the oil pump and other critical components. Contaminants in the oil system can lead to premature wear in a rebuilt engine. Replace any worn-out filters or screens to maintain optimal oil flow.
Finally, ensure all components are completely dry before reassembly. Moisture can lead to rust and corrosion in the engine once it is back in operation. By carefully inspecting and cleaning all engine components, you lay a solid foundation for a successful VR6 rebuild, ensuring that your Corrado performs at its best for years to come.
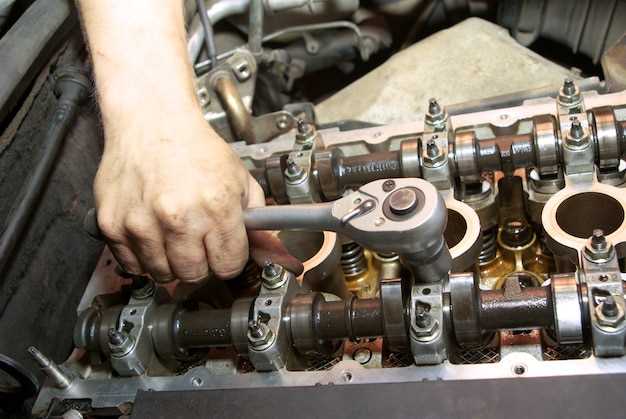
Reassembling the VR6 Engine: Key Techniques and Tips
Rebuilding the VR6 engine requires meticulous attention to detail during the reassembly process. Start by organizing all components and ensure you have all necessary tools at hand. A clean workspace is crucial for preventing any debris from contaminating the engine.
Begin with the installation of the main bearings. Use assembly lube to coat the bearings and crankshaft journals. Proper alignment is essential; follow the manufacturer’s specifications for torque settings to ensure the crankshaft is correctly secured.
Next, install the oil pump, ensuring proper orientation and securing it with the appropriate bolts. This is vital as the oil pump plays a significant role in maintaining sufficient oil pressure throughout the engine.
When reassembling the cylinder heads, inspect the head gaskets and ensure they are clean and free of any old material. Carefully torque the head bolts in the specified pattern and sequence to avoid warping the heads.
Pay close attention to the timing chain or belt installation. Incorrect timing can lead to severe engine damage. Use timing marks to ensure the engine is timed correctly, and double-check the adjustment before final assembly.
As you install the intake and exhaust manifolds, use new gaskets for a proper seal. Torque these components as per specifications, ensuring you maintain even pressure to avoid leaks.
Finally, once the engine is fully reassembled, rotate the crankshaft by hand several times to ensure smooth operation. This step is crucial before starting the engine as it allows you to check for any potential binding or misalignment.
By following these techniques and tips carefully, you can successfully rebuild and reassemble your VR6 engine, ensuring it performs optimally and reliably.
Testing Engine Compression and Running Diagnostics
Once you have completed the rebuild of your VR6 engine, it is essential to test the engine compression to ensure everything is functioning correctly. This process involves measuring the pressure in each cylinder to confirm that the rebuild has created a proper seal and that the components are working harmoniously.
To begin, gather the necessary tools: a compression tester, a wrench set, and a vehicle manual for specifications. Start by removing the spark plugs to prevent any resistance from ignition. Insert the compression tester into the spark plug hole of the first cylinder. Ensure it is secured tightly to avoid any leakage during testing.
Next, fully depress the throttle to allow maximum airflow into the engine. Crank the engine for about five seconds. Observe the reading on the compression tester gauge. Repeat this process for each cylinder, recording the pressure values. Ideally, they should be within the manufacturer’s specified range, showcasing that your rebuild has succeeded in achieving optimal compression across all cylinders.
If any readings are significantly lower than expected, this may indicate potential issues such as incomplete sealing of the piston rings or valves, or even a possible head gasket leak. In such cases, further diagnostics will be necessary to pinpoint the exact cause. This could involve a leak-down test, which can provide additional insights into where pressure loss is occurring.
After confirming that compression is within acceptable limits, proceed to run diagnostics on the engine using an OBD-II scanner. This tool can read trouble codes that may have arisen during the rebuild process. Connect the scanner to the vehicle’s diagnostic port and follow the prompts to retrieve any codes. Pay attention to any discrepancies, as these codes can indicate faults in the rebuilt components or even sensors that may need recalibration.
After addressing any codes and ensuring the engine is operating smoothly, the final step involves taking the VR6 for a test drive. Monitor the engine performance under various conditions, paying attention to any unusual sounds or behaviors. This thorough testing phase will ensure that your VR6 engine rebuild is successful and ready for reliable operation.
Tuning Your Rebuilt VR6 Engine for Optimal Performance
Tuning your rebuilt VR6 engine is crucial to unlock its full potential and enhance overall performance. Start by ensuring that all components are properly installed and functioning as intended. After confirming the mechanical integrity, proceed to refine the engine’s tuning to achieve the desired output.
The first step in tuning is to adjust the engine management system. This involves reprogramming the ECU with a performance chip or software that optimizes fuel maps and ignition timing for increased power. A custom tune tailored to your specific setup can yield significant improvements in throttle response and horsepower.
Next, consider upgrading the intake and exhaust systems. A high-performance air intake allows for better airflow, which can enhance combustion efficiency. Similarly, a performance exhaust system reduces backpressure, enabling the engine to expel exhaust gases more effectively. Both upgrades contribute to increased power output and improved engine efficiency.
Fuel delivery is another critical aspect of tuning the VR6 engine. Upgrading to a higher-flow fuel pump and larger injectors ensures that the engine receives an adequate supply of fuel, especially under high-load conditions. This is essential for maximizing performance and maintaining reliability.
Spark plugs and ignition timing also play a significant role in engine performance. Installing high-performance spark plugs and adjusting the ignition timing can result in better combustion characteristics, leading to improved power and fuel efficiency. Always ensure that the chosen spark plugs are compatible with the modifications made to the engine.
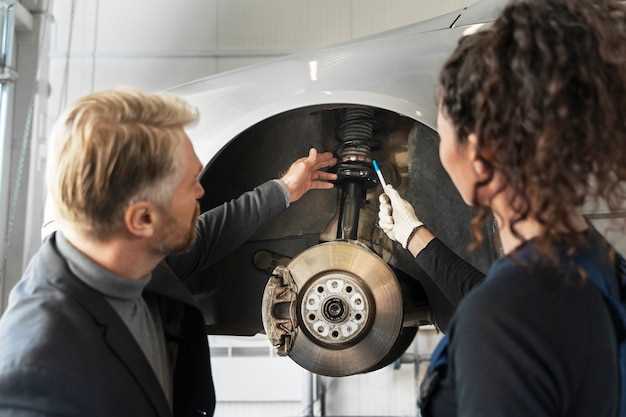
Finally, consider suspension and braking upgrades to complement the enhanced engine performance. Improved handling and stopping power are vital when tuning an engine for higher output, ensuring that the vehicle remains safe and enjoyable to drive.
In summary, tuning your rebuilt VR6 engine involves careful adjustments to the engine management system, intake and exhaust upgrades, fuel delivery enhancements, and ignition modifications. These steps collectively optimize performance, allowing your Corrado to perform at its best.


