

A slipping clutch can be a frustrating problem for any vehicle owner, especially for enthusiasts of the iconic Volkswagen Corrado. The term “slipping” refers to a condition where the clutch fails to engage fully, resulting in a loss of power transfer from the engine to the drivetrain. This issue can lead to decreased performance and can ultimately cause further damage if not addressed promptly.
Repairing a slipping clutch requires understanding the underlying causes, which may include worn clutch components, improper adjustments, or fluid leaks. Identifying the specific issue is crucial to effectively solving the problem. In this guide, we will explore the common signs of a slipping clutch, how to diagnose the issue, and the steps necessary for a successful repair.
By equipping yourself with the right knowledge and tools, you can tackle the clutch repair process with confidence. Whether you are a seasoned mechanic or a DIY enthusiast, this comprehensive guide aims to provide you with the information needed to restore your Corrado’s performance. Let’s get started on ensuring your vehicle runs smoothly once again!
Identifying Symptoms of a Slipping Clutch
A slipping clutch is a common issue that can affect the performance of your Corrado. Recognizing the symptoms early can prevent further damage and costly repairs. Here are the key signs to look for:
Difficulty in Acceleration: One of the most noticeable symptoms of a slipping clutch is a delay in acceleration. When the clutch fails to engage properly, the engine revs increase without a corresponding increase in vehicle speed. This can be particularly evident when climbing hills or during rapid acceleration.
High RPMs with No Power: If you notice that the engine’s RPMs rise significantly, but the car doesn’t move forward as expected, it’s a strong indication of a slipping clutch. This condition occurs due to the clutch disc slipping against the flywheel, preventing effective power transfer.
Unusual Noises: Listen for abnormal sounds such as grinding, squeaking, or rattling when you engage the clutch. These noises may indicate wear or damage to clutch components, which could lead to slippage.
Burning Smell: A burning smell can indicate that the clutch is overheating. This typically happens due to excessive slipping and can lead to further damage if not addressed promptly. If you detect this odor, it’s crucial to inspect the clutch system.
Inconsistent Engagement: If the clutch engages suddenly or feels spongy, it may be a sign of impending slippage. An inconsistent engagement can make it difficult to control the vehicle, posing a safety risk.
Understanding these symptoms can help you diagnose a slipping clutch and seek timely repair. Ignoring these signs can lead to more serious issues, so it’s essential to address them as soon as they arise.
Gathering Necessary Tools and Materials
To successfully perform a clutch repair on your Corrado, it is essential to gather all the necessary tools and materials beforehand. This preparation will streamline the repair process and help avoid any interruptions.
Start with basic hand tools: a socket set, including deep sockets, is crucial for removing the clutch assembly and associated components. A ratchet and a breaker bar will provide the torque needed for stubborn bolts. Additionally, a torque wrench is important to ensure that all bolts are tightened to the manufacturer’s specifications during reassembly.
You will also need a set of wrenches, including both metric and standard sizes, to address various fasteners around the transmission. Pliers and screwdrivers are essential for clipping any retaining springs or wiring and for prying components apart when necessary.
Next, gather specialized tools such as a clutch alignment tool. This tool is vital for ensuring the new clutch disc is correctly positioned during installation. A flywheel holder or locking tool may also be required to secure the flywheel in place while loosening or tightening bolts.
In terms of materials, make sure you have a new clutch kit, which typically includes the clutch disc, pressure plate, and release bearing. Consider replacing the flywheel if it shows signs of wear or scoring. Don’t forget to acquire any necessary fluids, such as transmission oil or gear oil for reassembly.
Lastly, keep safety gear on hand. A pair of gloves, safety glasses, and perhaps knee pads will make the repair process more comfortable and safe. With all these tools and materials ready, you can undertake the clutch repair on your Corrado with confidence.
Step-by-Step Clutch Inspection Process
Inspecting your clutch is crucial for identifying issues and ensuring proper performance. Follow this comprehensive guide to systematically examine your clutch.
-
Gather Necessary Tools
- Jack and jack stands
- Wrench set
- Torque wrench
- Screwdrivers
- Clutch alignment tool
-
Safety First
Ensure your vehicle is on a flat surface. Engage the parking brake and wear safety gear.
-
Lift the Vehicle
Use the jack to elevate the car, then secure it with jack stands. Make sure it is stable before proceeding.
-
Remove the Transmission
Detach the transmission from the engine. This involves removing the drive shaft, engine mounts, and any electrical connections.
-
Inspect Clutch Components
-
Clutch Disc
Check for wear and damage. A worn disc may cause slipping. Look for uneven surfaces or cracks.
-
Pressure Plate
Inspect the pressure plate for signs of wear or warping. It should be flat and free from hot spots.
-
Release Bearing
Check for smooth operation. A faulty bearing can lead to improper engagement and disengagement of the clutch.
-
Flywheel
Examine the flywheel for surface condition. A damaged flywheel may require resurfacing or replacement.
-
-
Check Hydraulic System
Inspect the clutch master and slave cylinders for leaks. Ensure the hydraulic lines are intact and free of corrosion.
-
Reassemble and Test
After inspection and necessary repairs, reassemble all components carefully. Ensure all bolts are torqued to specifications. Once reassembled, test the clutch operation to verify that the repair was successful.
Following these steps will provide you with a thorough understanding of your clutch’s condition and guide you in performing necessary repairs effectively.
Performing Clutch Adjustment Techniques
One of the primary reasons for a slipping clutch in your Corrado is improper adjustment. Adjusting the clutch can help ensure proper engagement and disengagement, significantly improving performance. Below are essential techniques for clutch adjustment.
| Step | Description |
|---|---|
| 1 | Identify the Type of Clutch System: Determine if your vehicle uses a cable-operated or hydraulic clutch system. This knowledge will guide your adjustment method. |
| 2 | Inspect the Clutch Free Play: Check the free play at the pedal. For most vehicles, there should be a small amount of pedal movement before the clutch engages. |
| 3 | Cable Adjustment: For cable clutches, locate the adjuster on the cable. Turn the adjuster to increase or decrease the cable tension according to the manufacturer’s specifications. |
| 4 | Hydraulic Adjustment: For hydraulic systems, inspect the master and slave cylinders for leaks. If everything is in order, make adjustments using the bleed valve to remove air from the system. |
| 5 | Test Drive: After making adjustments, take your vehicle for a test drive. Pay close attention to any signs of slipping or unusual noises when engaging the clutch. |
| 6 | Final Check: Reassess the adjustment after a short drive. It’s crucial to ensure that clutch engagement feels smooth and the slipping has been resolved. |
By carefully following these techniques for clutch adjustment, you can effectively address the issue of a slipping clutch in your Corrado. Consistent maintenance and proper adjustment will enhance longevity and overall driving experience.
Replacing Worn Clutch Components
A slipping clutch can significantly impact the performance of your Corrado, making it crucial to address the issue promptly. One of the primary solutions is to replace worn clutch components to restore optimal functioning.
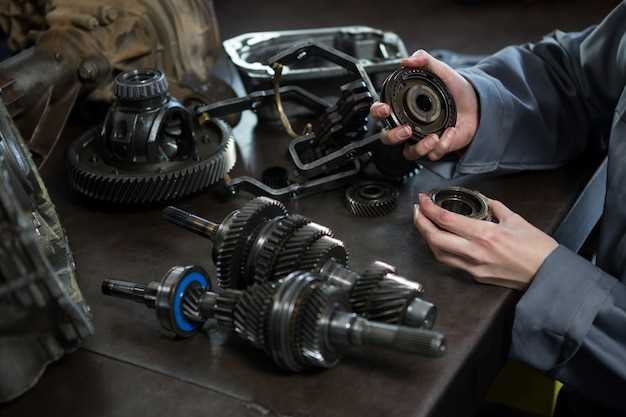
Begin by inspecting the components of the clutch assembly, which includes the clutch disc, pressure plate, and release bearing. These parts endure substantial wear over time, and any noticeable damage can lead to slippage. Ensure you have the proper tools and parts before starting the replacement process.
1. Clutch Disc: The clutch disc is a critical component that often suffers from friction material wear. If you notice glazing, cracks, or uneven surface, it’s time to replace it. Choose a high-quality replacement disc that matches your vehicle’s specifications for enhanced performance.
2. Pressure Plate: The pressure plate is responsible for applying force to the clutch disc, ensuring it engages properly. A worn or weak pressure plate can fail to maintain enough pressure, causing slipping. Inspect the pressure plate for warpage or damage and replace it if necessary.
3. Release Bearing: The release bearing facilitates the engagement and disengagement of the clutch. A worn bearing can lead to noise and difficulty in operation, contributing to a slipping sensation. Replace the bearing when changing the clutch components to avoid future issues.
Once you have replaced the worn components, make sure to inspect the flywheel as well. A damaged flywheel can lead to improper clutch engagement, which may result in slippage. If it shows signs of wear, consider resurfacing or replacing it.
After replacing the components, it’s advisable to bleed the hydraulic clutch system to eliminate any air and ensure proper function. Following these steps will help you achieve a reliable and effective clutch system in your Corrado, eliminating slipping issues and restoring driving pleasure.
Testing Your Repair: Ensuring Proper Clutch Engagement
Once you have completed the clutch repair on your Corrado, it’s crucial to test the functionality to ensure proper engagement. Begin by starting the engine and allowing it to warm up. This ensures all components are operating under normal conditions. With the engine running, press the clutch pedal fully to the floor and shift through the gears. Smooth transitions between gears indicate that the clutch is engaging and disengaging effectively.
Next, perform a road test. Drive at a low speed and gradually accelerate while shifting through the gears. Pay attention to any slipping or difficulty in engaging each gear. If the engine revs increase without a corresponding increase in speed, this could signify that the clutch is still not fully engaging, indicating a need for further adjustment or inspection.
Additionally, check for unusual noises during the engagement process. Any grinding or clunking sounds may suggest misalignment or wear that requires further attention. Ensure that the clutch pedal feel is consistent, allowing for a clear transition between the pressed and released positions.
If the initial tests prove successful, consider testing under various driving conditions, such as inclines or heavy acceleration. This will provide a comprehensive understanding of how well the clutch performs under stress. Remember to review any adjustment specifications for your specific clutch system, as proper alignment is essential for full functionality.
By methodically testing your repair, you can confirm the effectiveness of your work and the reliability of your vehicle’s clutch engagement.


