

Repainting your car is more than just a cosmetic change; it’s an opportunity to breathe new life into your beloved Corrado. With the right tools and a bit of DIY enthusiasm, you can achieve a professional-looking respray right from the comfort of your garage. This guide is designed to take you through each step of the process, ensuring that you not only enhance the appearance of your vehicle but also protect its underlying surfaces.
Before diving into the repainting process, it’s crucial to adequately prepare both your workspace and your Corrado. A clean and well-ventilated area will significantly impact the quality of your finish. Additionally, understanding the fundamentals of car painting, such as selecting the appropriate type of paint and tools, will set a solid foundation for your project. This guide will cover everything from surface preparation to the final clear coat application, making the complex task of respraying your vehicle manageable.
Throughout this guide, you’ll discover valuable tips and techniques that can help minimize common pitfalls associated with DIY car painting. By following these step-by-step instructions, you’ll gain the confidence to transform your Corrado into a stunning masterpiece, all while saving money compared to professional services. Get ready to roll up your sleeves and embark on an exciting DIY adventure that will leave your car looking fabulous!
Choosing the Right Paint Type for Your Corrado
Selecting the appropriate paint for your Corrado is crucial to achieving the desired finish and durability after a respray. Different paint types offer unique properties and advantages. Here’s a guide to help you choose the right paint for your car.
When it comes to automotive paints, there are two main categories to consider:
- Solvent-Based Paints:
- Provides a hard, durable finish.
- Offers excellent color retention and glossiness.
- Typically dries faster than water-based alternatives.
- Water-Based Paints:
- Environmentally friendly due to lower volatile organic compounds (VOCs).
- Less harmful fumes, making it safer to use indoors.
- Can be more challenging to work with and may require more time to achieve optimal durability.
Consider the following paint types suitable for a Corrado respray:
- Acrylic Enamel:
A tough finish that is easy to apply. It’s a popular choice for DIY enthusiasts due to its simplicity and good color retention.
- Polyurethane:
This two-part paint system offers a high-gloss finish and remarkable durability. It’s resistant to scratches and chemicals, making it ideal for a long-lasting respray.
- Base Coat/Clear Coat:
This system provides depth and shine. The base coat contains color while the clear coat protects against UV rays and environmental factors.
- Matte Finishes:
If you’re looking for a unique look, consider a matte finish. It requires special maintenance but offers an eye-catching appearance.
In conclusion, choosing the right paint type for your Corrado is essential for achieving the best results after a respray. Consider factors such as durability, aesthetics, and ease of application to make an informed decision. Your choice will not only enhance the car’s appearance but also provide lasting protection against the elements.
Preparing Your Car’s Surface for a Respray
Before embarking on your diy painting project for your car, it is crucial to properly prepare the surface of your car. This step ensures that the paint adheres effectively and provides a smooth, professional finish.
Start by thoroughly washing the exterior of the vehicle with car soap to eliminate dirt, grime, and any old wax that could interfere with adhesion. Rinse thoroughly and allow the surface to dry completely before proceeding.
Next, assess the condition of the paint. If there are any rust spots, dents, or scratches, these imperfections must be addressed. Use sandpaper or a grinding tool to remove rust and smooth out any damage, ensuring the surface is even and clean. Grade 80-120 sandpaper is generally suitable for heavy imperfections, while grade 400-600 can be used for a smoother finish.
After sanding, it’s essential to wipe down the surface with a clean, lint-free cloth and a solvent such as mineral spirits or isopropyl alcohol. This process removes any dust or oil, ensuring the surface is as clean as possible for the next steps.
Consider using a primer if you are changing colors or if the existing paint is in particularly bad shape. A good quality primer helps the topcoat adhere better and provides additional protection against rust.
Once the primer is applied and fully dried, perform a light sanding with fine-grit sandpaper to further smooth the surface. This step helps maintain a uniform texture before the application of your chosen paint.
In summary, proper surface preparation is vital for achieving a durable and attractive finish when repainting your car. By following these steps, you’ll ensure your diy project starts off on the right foot, leading to successful results.
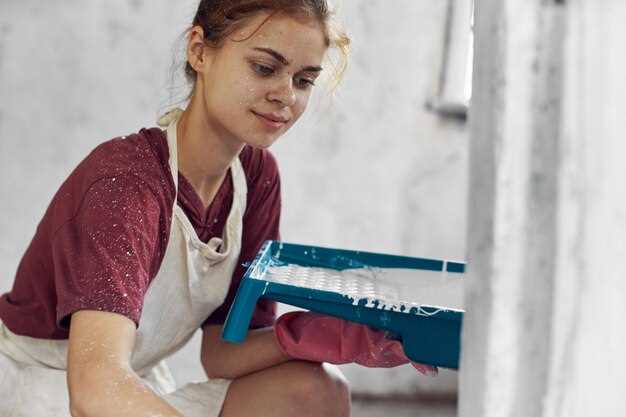
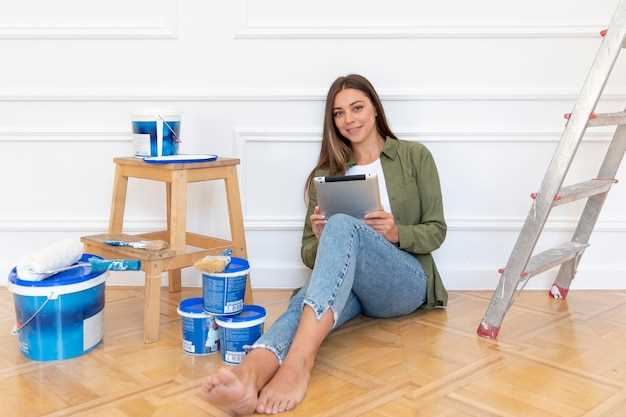
Gathering the Necessary Tools and Materials
Before beginning the process of respraying your car, it is essential to gather all necessary tools and materials to ensure a smooth and efficient DIY project. Having everything on hand will save you time and prevent interruptions during the painting process.
Start by collecting basic painting tools, including a paint sprayer or spray guns, air compressor, and paint mixing containers. These tools are crucial for achieving an even coat and a professional finish. A good-quality mask or respirator is also necessary to protect yourself from fumes and dust during the respray.
Next, gather surface preparation materials. Sandpaper in various grits (from coarse to fine) is important for smoothing out imperfections. You’ll also need a primer designed for automotive applications, which helps the paint adhere properly. Consider using a tack cloth to remove dust particles before applying the primer or paint.
For the actual painting process, select high-quality automotive paint that matches your car’s color. If you plan on doing multiple coats, be sure to purchase enough paint to cover your project adequately. Accompanying clear coat will provide extra protection and enhance the shine of the final finish.
Finally, prepare for cleanup with paint thinner or solvent, rags, and disposable containers. Having these materials ready will help you maintain a clean workspace and manage spills effectively.
Applying Primer: Techniques for a Smooth Finish
Before proceeding with the respray of your Corrado, applying primer is essential for achieving a smooth finish. Primer helps paint adhere better to the surface, enhances durability, and provides a uniform base. Here are detailed techniques to ensure an effective application.
First, prepare the surface thoroughly. Clean the area with soap and water to remove dirt, oil, and old paint residues. Sanding the surface lightly will also aid in better adhesion. Use fine-grit sandpaper to create a smooth texture. After sanding, wipe down the surface with a tack cloth to eliminate dust particles, ensuring a clean working area before primer application.
Select the right primer for automotive use. Choose a high-quality product that is compatible with the type of paint you plan to use. A spray primer can be an excellent choice for DIY projects, as it allows for even coverage and minimizes brush strokes. Shake the primer can thoroughly before use to ensure a consistent mixture.
When applying the primer, work in a well-ventilated area and wear appropriate safety gear, including gloves and a mask. Hold the spray can approximately 6-12 inches from the surface and apply in light, even coats. Start at one end and move in a steady motion across the panel, overlapping each pass slightly to avoid streaks. It’s better to apply multiple thin coats rather than a single thick layer to prevent drips and runs.
After the first coat dries, inspect the surface for any uneven areas. Lightly sand these spots before applying additional coats. A minimum of two coats is recommended for optimal coverage. Allow adequate drying time between each coat as indicated on the primer can. Once satisfied with the primer application, you can feel confident in moving forward with the paint project.
In summary, taking the time to apply primer correctly not only elevates the overall aesthetic of your respray but also contributes to the longevity and protection of the paint finish on your Corrado.
Mastering the Application of Paint: Tips and Tricks
When repainting your car, achieving a smooth and professional finish requires careful attention to detail during the application of paint. Here are some essential tips and tricks to help you navigate your DIY project successfully.
First and foremost, ensure you have the right tools. Invest in high-quality spray guns or paint applicators designed specifically for automotive paint. A consistent spray pattern is crucial for an even application. Additionally, select the appropriate nozzle size to match your paint viscosity, as this will greatly influence the final result.
Before you begin painting, prepare the surface meticulously. Clean the area thoroughly to remove dirt, dust, and grease. Sand the existing paint to create a smooth bonding surface; use progressively finer grits to achieve a flawless finish. Priming exposed metal or repairs is essential to prevent rust and enhance adhesion.
Consider your paint environment. Optimal conditions for painting include a well-ventilated area with low humidity and moderate temperatures. Avoid painting in direct sunlight, as it can cause the paint to dry too quickly, leading to imperfections such as runs or sags.
When applying the paint, maintain a consistent distance between the spray gun and the car surface–typically around six to eight inches. Apply multiple thin coats rather than one thick coat, allowing each layer to dry as recommended by the manufacturer. This method not only prevents drips but also promotes better durability.
Always overlap your spray passes by about 50% to ensure complete coverage and uniformity. Keep your movements steady and smooth, which minimizes the risk of uneven patches. Pay attention to the edges and hard-to-reach spots by using a smaller nozzle or brush, ensuring no area is overlooked.
Lastly, after the final coat, allow the paint to cure completely before subjecting the surface to any stress, including washing or waxing. This patience will ensure the longevity of your newly painted car and enhance its visual appeal.
Finishing Touches and Curing Your New Paint Job
After successfully completing the respray of your Corrado, it’s essential to focus on the finishing touches that will enhance the overall appearance and longevity of your new paint job. Start by inspecting the surface for any imperfections, such as dust particles or uneven areas. If you notice any flaws, wet sand the affected spots lightly with fine-grit sandpaper to achieve a smooth finish. Be gentle to avoid damaging the new paint layer.
Next, apply a high-quality automotive polish to refine the surface. This step not only adds shine but also helps to protect the paint from environmental factors. Use a soft microfiber cloth to buff the polish into the surface using circular motions. This process enhances the depth of color and provides a sleek, professional look.
Once you are satisfied with the finish, it’s crucial to cure the paint properly. Depending on the type of paint used–enamel or urethane–the curing time may vary. Generally, allow at least 24 to 48 hours before exposing the car to moisture or road conditions. During this period, keep the vehicle indoors or covered to prevent contamination and ensure optimal curing conditions.
After the initial cure time, your new paint job will benefit from a complete hardening period, which can take up to a few weeks. It’s advisable to avoid waxing or applying any sealants until this hardening process is complete, as premature application can interfere with adhesion and longevity. Following these steps will ensure your respray looks exceptional and remains protected for years to come.


