

The bumper of your VW Corrado plays a crucial role in the overall aesthetics and safety of the vehicle. Over time, wear and tear can lead to cracks or, in some cases, complete breakages. It is essential to address these issues promptly, not only to maintain the car’s appearance but also to ensure its structural integrity during collisions.
In this guide, we will walk you through the replacement process for a cracked bumper on your VW Corrado. Whether you are a seasoned car enthusiast or a newcomer to automotive repairs, this step-by-step approach will provide clear instructions and helpful tips to facilitate the repair process.
By following our instructions, you can save on labor costs and gain valuable hands-on experience. Let’s dive into the tools needed and the procedures involved to get your VW Corrado back in top shape with a brand-new bumper.
Assessing the Damage: Identifying Cracks and Breaks
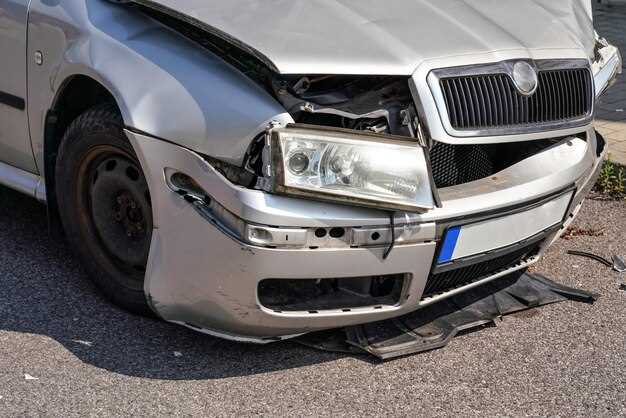
When dealing with cracked bumpers on your VW Corrado, the first step is to accurately assess the damage. Understanding the extent of the cracks and breaks is essential for deciding between repair and replacement.
- Visual Inspection: Start with a thorough visual inspection of the bumper’s exterior. Look for signs of cracks, breaks, or discoloration.
- Type of Damage: Determine the type of damage present. Cracks can be categorized as surface cracks or structural breaks.
- Surface Cracks:
- Often shallow, they may not compromise the bumper’s integrity.
- May be repairable through sanding and applying a fiberglass repair kit.
- Structural Breaks:
- Indicate deeper damage that could affect the overall strength of the bumper.
- Typically require replacement to ensure safety and performance.
To further evaluate the severity of the damage, consider the following:
- Length and Width of Cracks: Longer and wider cracks typically suggest a need for replacement.
- Flexibility of the Material: If the cracked area is flexible or deforming, it may not hold up after repair.
- Location of Damage: Cracks near mounting points or high-stress areas are more critical and often require replacement.
Document your findings, as this assessment will guide your next steps, ensuring you make an informed decision on whether to proceed with repair or choose a replacement for your VW Corrado’s bumper.
Gathering Necessary Tools and Materials for Replacement

Before starting the bumper replacement on your VW Corrado, it is crucial to collect all the necessary tools and materials. Proper preparation ensures a smooth and efficient process, ultimately resulting in a successful exterior repair.
First, you will need a set of basic hand tools, including a ratchet wrench with sockets, a screwdriver set, and pliers. These tools will help you remove the old bumper and install the new one securely. Make sure to have both Phillips and flathead screwdrivers, as different fasteners may be present.
A torque wrench is also essential for tightening bolts to the manufacturer’s specifications. This tool will help maintain the integrity and safety of the vehicle’s exterior after the replacement.
Next, consider getting a trim removal tool. This specialized tool makes it easier to detach clips and fastenings without damaging the surrounding bodywork. It reduces the risk of unnecessary scratches on the VW Corrado’s exterior during the removal process.
For the actual bumper replacement, you will need the new bumper itself, which should be compatible with your model year. Verify the specifications to ensure a proper fit. Additionally, having new mounting hardware, such as bolts and clips, can prevent potential issues with worn or damaged components during installation.
Lastly, it is advisable to have some cleaning supplies on hand, such as a microfiber cloth and glass cleaner. Cleaning the attachment areas will promote a better connection and finish between the bumper and the vehicle. With all tools and materials ready, you can confidently proceed with the bumper replacement process.
Removing the Old Bumper: Step-by-Step Instructions
To begin the process of removing the old bumper from your VW Corrado, ensure you have all necessary tools at hand, including a socket set, screwdrivers, and a trim removal tool. Carefully inspect the exterior of the bumper for any visible fasteners and clips that may need to be removed.
1. Start by disconnecting the vehicle’s battery to prevent any electrical issues while working on the bumper. This step is crucial for your safety.
2. Next, locate and remove any screws or bolts securing the bumper to the chassis. These are often found in the wheel wells and under the vehicle. Use the appropriate socket or screwdriver to carefully extract them.
3. After removing the fasteners, you will need to detach the bumper from the side clips. Gently pull the bumper away from the body of the car, taking care not to damage the exterior during this process. It’s advisable to have a helper hold the bumper as you work on the clips.
4. Once the side clips are released, inspect the lower edge of the bumper for any additional fasteners. Remove them using the same tools. Make sure to keep all fasteners in a safe location for reinstallation purposes.
5. Finally, after ensuring all attachments are removed, carefully pull the bumper away from the car. Keep an eye on any wiring that might be connected to lights or sensors. If necessary, disconnect the wiring by gently pressing down on the clips before fully removing the bumper.
With the old bumper removed, you are now ready to proceed with any repairs or the installation of a new bumper. Following these clear steps ensures a smooth removal process and safeguards the vehicle’s exterior.
Preparing the New Bumper for Installation
Before proceeding with the installation of your new bumper, it’s essential to ensure that it is adequately prepared for a seamless replacement process. Start by inspecting the bumper for any damage that may have occurred during shipping. Check for cracks or scratches that could affect its aesthetics and functionality.
Next, clean the bumper thoroughly using a mild soap solution to remove any dirt, grease, or factory wax. This cleaning process will ensure that any adhesive or mounting hardware can easily adhere during installation. Rinse it off with clean water and allow it to dry completely.
If your new bumper requires additional modifications, such as drilling holes for mounting or cutting slots for airflow, make these adjustments carefully. Always refer to the manufacturer’s guidelines to ensure accuracy during this stage. Proper alignment of these features is crucial for a successful fit.
Additionally, consider applying a protective coating or primer to the bumper if it has bare surfaces that may be exposed to elements after installation. This step can help prevent deterioration and extend the lifespan of the bumper.
Lastly, gather all necessary tools and hardware you will require during the installation process. Having everything prepared in advance will facilitate a smoother replacement, ensuring that you can complete the task efficiently.
Installing the New Bumper: A Detailed Guide
Replacing the bumper on your VW Corrado can significantly enhance its exterior aesthetics while providing essential protection. Follow these steps for a successful installation of the new bumper.
- Gather Necessary Tools and Materials:
- New bumper
- Socket set
- Screwdriver set
- Trim removal tool
- Torque wrench
- Cleaning supplies
- Prepare the Vehicle:
Park the VW Corrado on a flat surface and engage the parking brake. Disconnect the battery to avoid any electrical issues during the repair.
- Remove the Old Bumper:
Start by locating and removing the screws or bolts that hold the old bumper in place. Use the trim removal tool to gently pop off any clips. Take care not to damage adjacent exterior parts.
- Inspect and Clean the Area:
Once the old bumper is removed, inspect the mounting points for any damage. Clean the area where the new bumper will attach to ensure a secure fit.
- Install the New Bumper:
Align the new bumper with the mounting points on the vehicle. Ensure that it sits evenly and the alignment is correct. Secure the bumper in place using the screws or bolts removed earlier, tightening them to the manufacturer’s specifications using the torque wrench.
- Reconnect Electrical Components:
If applicable, reconnect any electrical components such as fog lights or sensors that were disconnected during the removal process.
- Final Checks:
Inspect the installation to ensure everything is securely fastened and properly aligned. Reconnect the battery and test any electrical features to confirm functionality.
Once the installation is complete, take your time to review the new bumper’s fit and finish. A well-replaced bumper not only improves the vehicle’s exterior but also protects critical components in the event of a collision.
Finishing Touches: Painting and Sealing the New Bumper
Once you have successfully replaced the cracked bumper on your VW Corrado, the next step is to ensure that the new exterior not only matches the vehicle’s finish but also offers long-lasting protection. This process involves painting and sealing the bumper, which is crucial for both aesthetic appeal and durability.
Before you start the painting process, it is essential to prepare the bumper correctly. Ensure the surface is clean, dry, and free from dust or oils. Use a mild detergent to wash the bumper, followed by a thorough rinsing. After drying, lightly sand the surface with fine-grit sandpaper to create a better adhesion surface for the paint.
After preparing the bumper, the painting can commence. Choose high-quality automotive paint that matches the original color of your VW Corrado. It is advisable to use paint specifically designed for exterior use to enhance durability against environmental factors. Follow these steps for optimal results:
| Step | Description |
|---|---|
| 1 | Apply a primer coat if necessary, especially if the bumper is unpainted or has been sanded. |
| 2 | Spray the first coat of paint evenly, holding the spray can or gun about 10-12 inches from the surface. |
| 3 | Allow the first coat to dry completely before applying additional coats. |
| 4 | Apply a second coat, ensuring full coverage and consistency. |
| 5 | Once satisfied with the layers, apply a clear coat to protect the paint and add shine. |
After the painting is finished, allow sufficient time for all coatings to cure properly. This may take several hours or even days, depending on the product used. Once dried, assess the new bumper for any imperfections and touch up as necessary.
The final step is sealing the bumper, which provides an additional layer of protection against moisture, UV rays, and other environmental stresses that can cause future damage. Select a high-quality sealant designed for automotive use. Apply it according to the manufacturer’s instructions, ensuring complete coverage of the paint surface.
With your new bumper painted and sealed, your VW Corrado will exhibit a refreshed exterior that stands up to the rigors of daily driving while enhancing the overall aesthetics of your vehicle.


